Setting up the headset
Windows XP
- Attach USB headset to the computer
- Take note of the name of the headset you intend to use with NativeAccent.
- Attach the headset via the computers USB port.
- Wait for the computer to finish recognizing the headset. Install the headset drivers if applicable.
- Select preferred headset
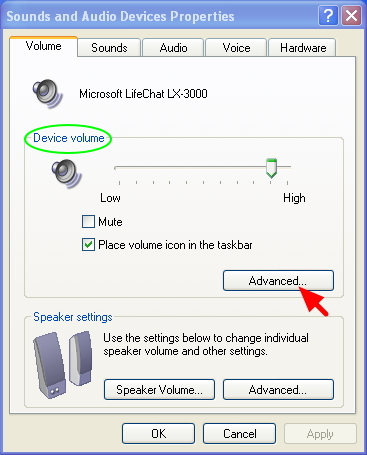
- From the system’s tray, right-click on
the Volume icon and
select Adjust Audio Properties to
open the Sounds and Audio Devices Properties window (Or go to Start
-> Control Panel -> Sounds and Audio Devices
)

- In the Device volume section, click the Advanced button.
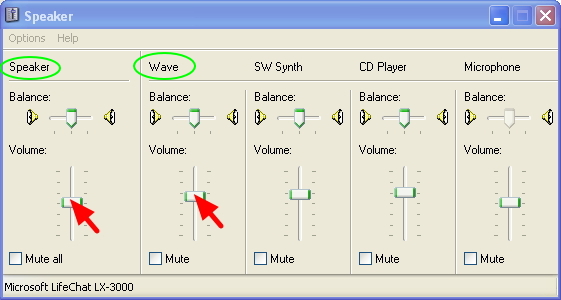
- Note the name at the bottom of the
Speaker window.
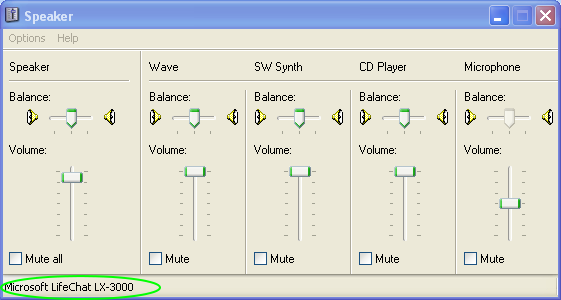
If it is the same as the attached (preferred) headset then the headset has been selected (If this is the case then skip to step 3 – Turn AGC off). - Click on Options, then Properties to go to the Properties
window.
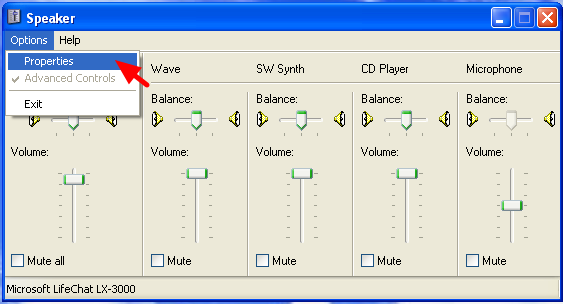
- From the Mixer
devices dropdown, pick the attached or preferred headset
from the list.

- Click on OK to accept the changes.
- Back at the Speaker window, note the name of the attached headset at the bottom.
- Turn AGC off
- In the Speaker window, click on Options and then on Properties.
- In the Adjust volume
for section, pick Recording.
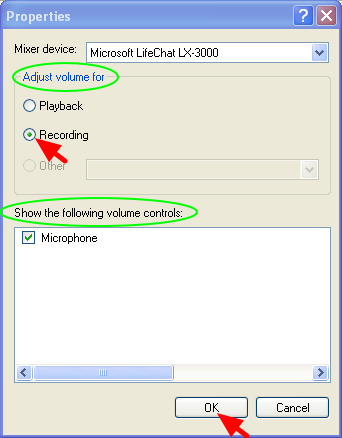
- In the Show the following volume controls: section, select Microphone.
- Click OK to accept the changes.
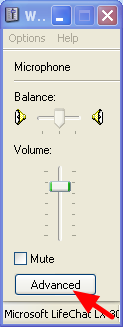
- In the window that pops up (Wave In), click on Advanced.
- In the Other
Controls section, unselect the AGC box.
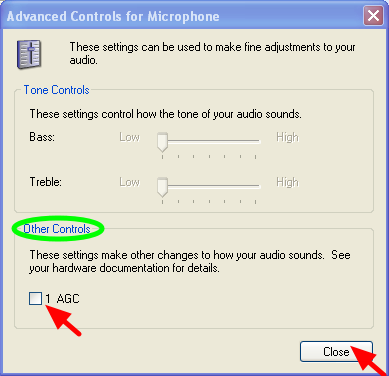
- Click on Close to return to the Wave In window.
- Adjust the Recording (mic) volume
- In the Wave
In window, slide the microphone volume up and down to
adjust the microphone volume.
- Adjust the Speaker Volume
- Back at the Speaker window
- Locate the speaker slider and move it up or down to adjust the speaker volume
- Locate the Wave slider and slide it up.
Windows 7
- Select preferred headset
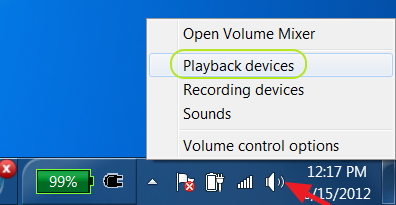
- From the system’s tray, right-click on the Volume icon and
select Playback devices (Or go to Start -> Control Panel -> Hardware and Sound
-> Sound -> Manage audio devices).
- From the Sound window, click on the attached or preferred
headset.
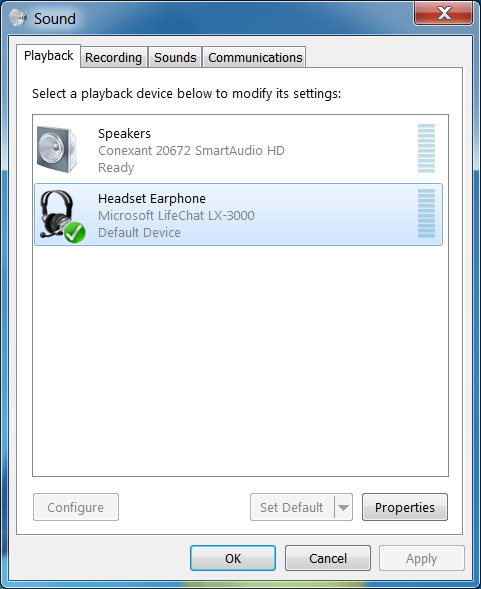
- Double-click on the attached or preferred headset’s earphone option.
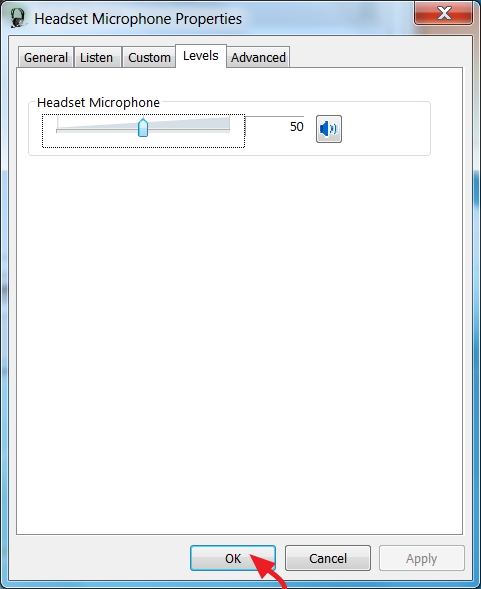
- At the Headset Earphone Properties window, click on the Levels
tab
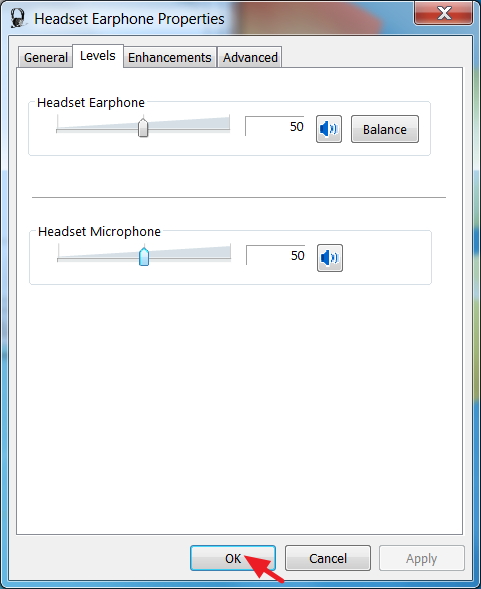
- Click on the Headset Earphone slide-bar to adjust to desired level.
- Click on the Headset Microphone slide-bar to adjust to desired level.
- Click the OK button to accept changes.
- Back at the Sound window, click on the Recording tab.
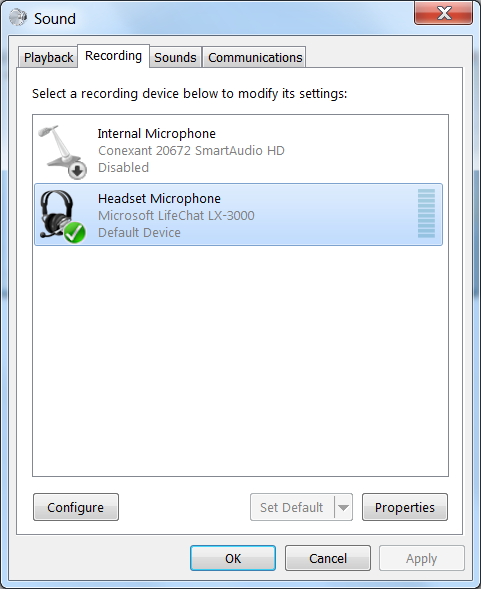
- Click on the attached or preferred headset’s Microphone
option.
(Note: If the preferred headset Microphone’s option does not have the green check mark on it, press the Set Default to set the preferred headset as the default headset) - Double-click on the attached or preferred headset’s Microphone option.
- At the Headset Microphone Properties window, click on the Listen
tab.
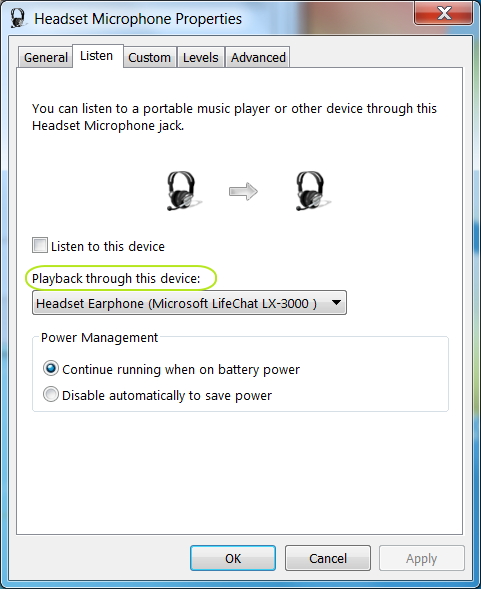
- In the Playback through this device dropdown, select the attached or preferred headset.
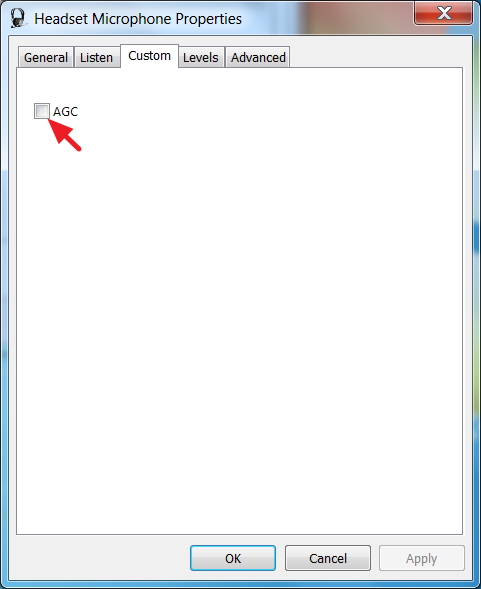
- Click on the Custom tab.
- Unselect the AGC option
- Click on the Levels tab.
(Note: If the preferred headset does not have the green check mark on it, press the Set Default to set the preferred headset as the default headset)